How to contribute
This document describes how to contribute this project. There are several ways to contribute to this project as below:
Before contributing
Please check following items before contributing:
Understanding this project
Please check this What is PythonRobotics? section and this paper PythonRobotics: a Python code collection of robotics algorithms to understand the philosophies of this project.
Check your Python version.
We only accept a PR for Python 3.13.x or higher.
We will not accept a PR for Python 2.x.
Before opening a pull request
Check the items that apply to your change before opening a PR. The steps below explain these points in more detail.
Scope: Focus on one algorithm, bug, or documentation topic. Split large changes into smaller PRs, and propose substantial changes in an issue first.
Diff: Use a separate branch and review the diff against
master. Remove unrelated formatting, parameter, dependency, and CI configuration changes.Readability: Use descriptive names and small, clear functions. Keep the code easy to relate to the algorithm’s equations, even when optimizing it.
Compatibility: Follow Check your Python version. and the current CI configuration. Use only the existing Requirements libraries.
Existing behavior: Preserve default parameters and working examples unless the change is intentional and explained. Do not weaken tests to hide failures.
Tests: For code changes, add or extend tests under
teststhat check the expected result and relevant boundary cases. Run examples without animation and runbash runtests.shlocally, including its code style checks.Documentation: Update the existing official RST page, or add one for a new example. Explain the algorithm and mathematics there; explain code, inputs, outputs, and units in headers and docstrings. Write these explanations in English.
Navigation and rendering: Add new pages to the appropriate parent
toctree. Build the docs and inspect the generated HTML, including equations, lists, links, and images.Animation: For new examples or changed visual behavior, check that the animation makes the result, colors, and lines understandable. Submit new GIFs to PythonRoboticsGifs and link them from the documentation.
PR description: Prepare the issue link, reason for the change, and test results. Include before-and-after results where useful, and comparable timings with the test configuration for performance improvements.
1. Adding a new algorithm example
This is a step by step manual to add a new algorithm example.
Step 1: Choose an algorithm to implement
Before choosing an algorithm, please check the Getting Started doc to understand this project’s philosophy and setup your development environment.
If an algorithm is widely used and successful, let’s create an issue to propose it for our community.
If some people agree by thumbs up or posting positive comments, let go to next step.
It is OK to just create an issue to propose adding an algorithm, someone might implement it.
In that case, please share any papers or documentations to implement it.
Step 2: Implement the algorithm with matplotlib based animation
When you implement an algorithm, please keep the following items in mind.
Use only Python. Other language code is not acceptable.
Use the Python version described in Check your Python version. and run the example with the versions used by the current CI configuration.
Use matplotlib based animation to show how the algorithm works. Make the start, goal, obstacles, and result clear where applicable, and explain the meaning of colors and lines. The animation should help readers understand the algorithm’s behavior, such as how a path changes after detecting an obstacle.
Only use current Requirements libraries, not adding new dependencies.
Keep the code simple and easy to follow. The main goal is to help beginners understand the algorithm. Favor readability over performance or additional abstractions, and keep the implementation recognizable from the algorithm’s equations. Avoid shortcuts that only work for the default simulation.
Use descriptive names instead of unexplained abbreviations or single-letter names. For example, prefer
parent_indextopind. If mathematical symbols help relate the code to an equation, explain their meaning. Split long functions and complex conditions into clearly named functions or intermediate variables, and follow the style of nearby examples.Add a short file header describing the example, its author, and relevant references. Use docstrings to explain functions, classes, inputs, outputs, and configuration parameters, including units where applicable. Keep useful existing explanations when refactoring.
Use named configuration parameters instead of unexplained numeric constants. Preserve existing defaults unless changing them is part of the intended fix; set parameters for a particular test inside that test.
Put the runnable example in a
main()function and guard plotting withshow_animationso that the example also runs without animation. Prefer existing Python, NumPy, SciPy, and project functions when they make the algorithm easier to read, rather than duplicating the same implementation.
Step 3: Add a unittest
If you add a new algorithm sample code, please add a unit test file under tests dir.
This sample test code might help you : test_a_star.py.
At the least, try to run the example code without animation in the unit test.
When extending an existing example, add test cases to its existing test file
where possible. Give tests descriptive names that explain the scenario, such as
test_no_obstacle or test_too_big_step_size. Cover the added algorithm
variants and relevant boundary cases.
For a bug fix, reproduce the reported problem and assert the expected result, not just that the code runs without an exception. Keep existing tests and default examples working. Do not weaken an assertion merely to make a changed algorithm pass; explain and test any intentional change in behavior.
Run the test suite locally from the repository root:
bash runtests.sh
The test_codestyle.py check code style for your PR’s codes.
Step 4: Write a document about the algorithm
Please describe the algorithm’s basic steps, mathematical background, and relevant references, with graphs and an animation GIF. Explain how it differs from related algorithms and where it is useful when this helps readers understand the example.
This project is using Sphinx as a document builder, all documentations are written by reStructuredText.
For an existing example, update its official document instead of creating a
separate README or a duplicate explanation. For a new example, add a
*_main.rst page under the appropriate category in doc modules dir and
include it in the parent page’s toctree. Follow the naming and toctree entries
of nearby pages so that the new page appears in the documentation navigation.
Please check other documents for details.
You can build the doc locally based on doc README.
After building, open the generated HTML or the PR’s documentation artifact and check the changed pages. Confirm that equations, lists, links, images, and animations render correctly, and that the page is reachable from its parent. A successful build alone does not guarantee that the page looks correct.
For creating a gif animation, you can use this tool: matplotrecorder.
The created gif file should be stored in the PythonRoboticsGifs repository, so please create a PR to add it and refer to it in the doc.
Note that the reStructuredText based doc should only focus on the mathematics and the algorithm of the example.
Documentations related codes should be in the python script as the header comments of the script or docstrings of each function.
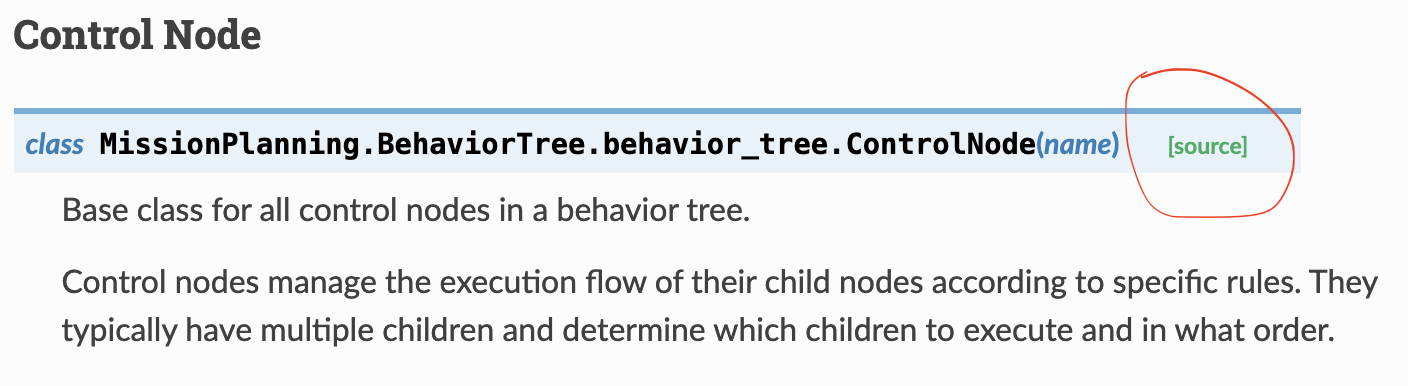
Also, each document should have a link to the code in Github. You can easily add the link by using the .. autoclass::, .. autofunction::, and .. automodule by Sphinx’s autodoc module.
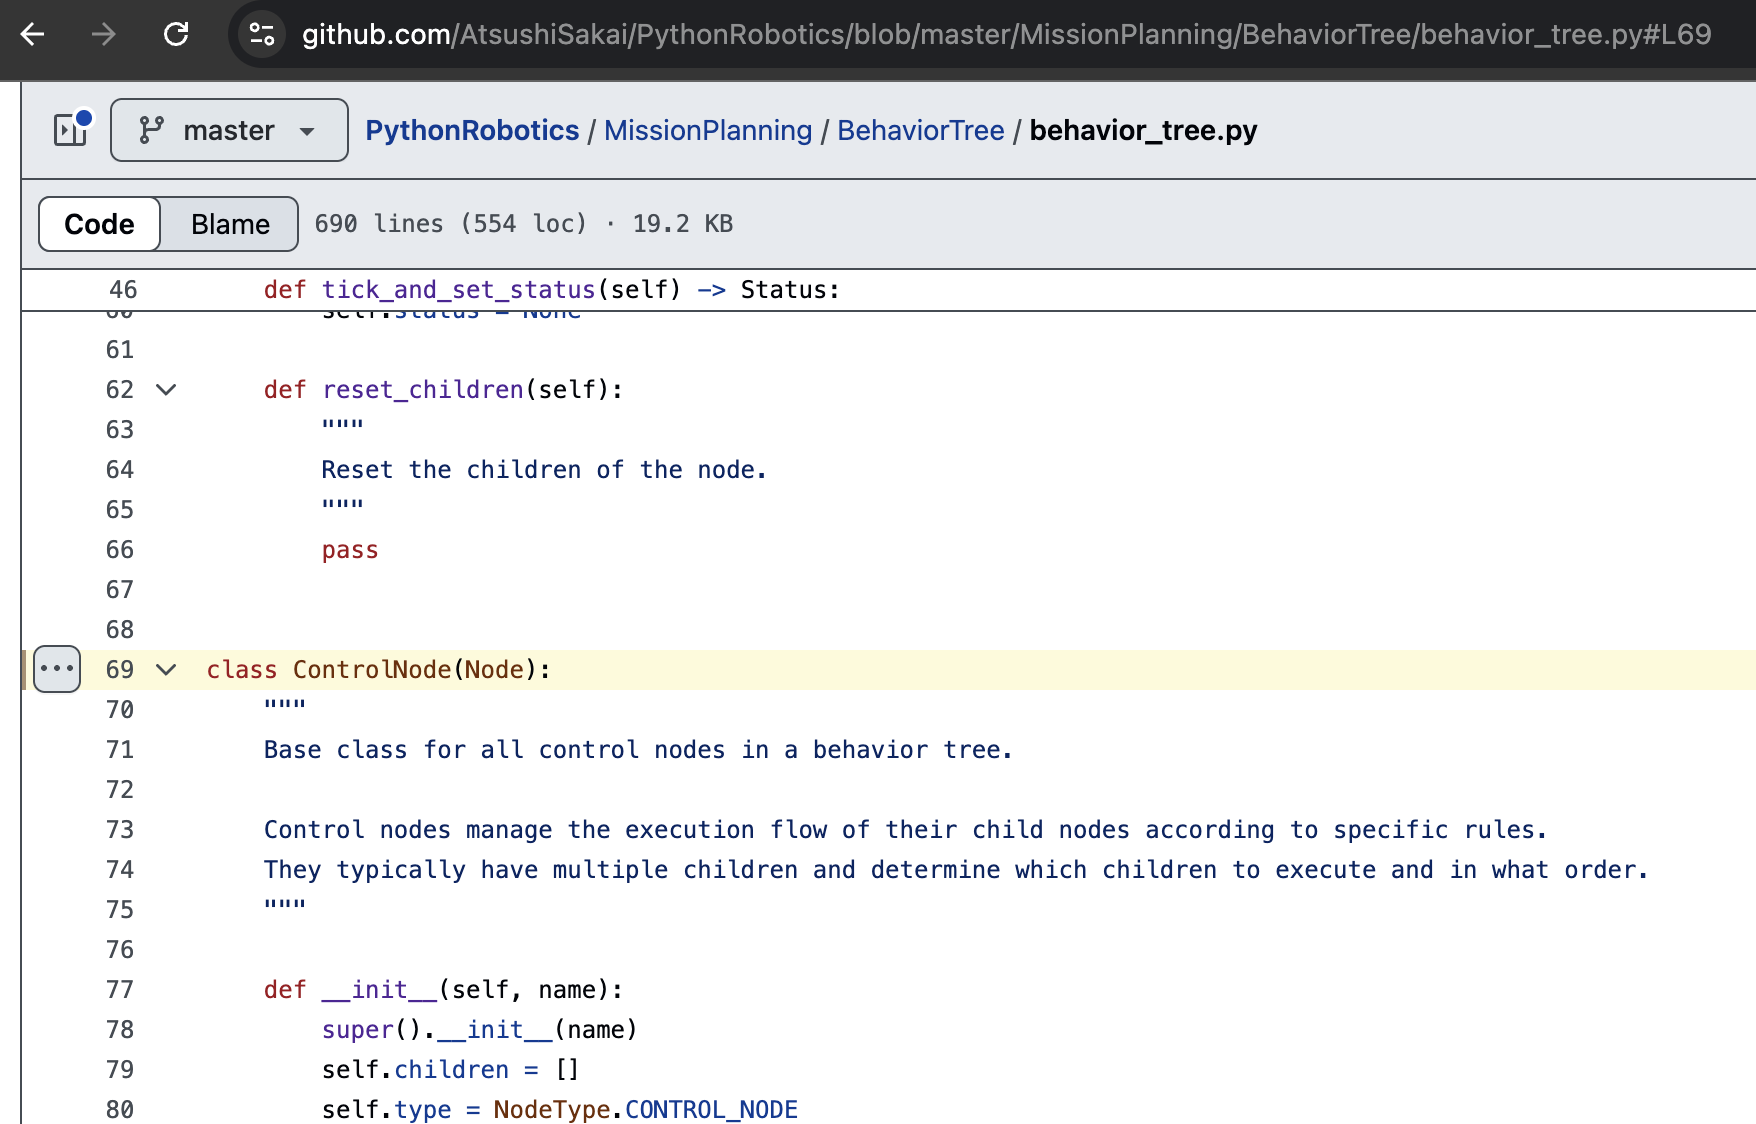
Using this autodoc module, the generated documentations have the link to the code in Github like:
When you click the link, you will jump to the source code in Github like:
Step 5: Submit a pull request and fix codes based on review
Use the Before opening a pull request checklist, then submit your PR when the code, tests, and documentation are ready.
In the PR description, link the relevant issue and explain the problem, why the change solves it, and how you tested it. For changes to a simulation, include before-and-after results or animations where useful. For a performance improvement, explain the technique and provide comparable timings and the configuration used to obtain them.
At first, please fix all CI errors before code review.
Check the test, code style, and documentation build results. If a failure appears unrelated to your changes, report the failing check and relevant log rather than changing CI settings or removing tests to hide the failure.
You can check your PR doc from the CI panel.
After the “ci/circleci: build_doc” CI is succeeded, you can access your PR doc with clicking the [Details] of the “ci/circleci: build_doc artifact” CI.

After that, I will start the review.
Note that this is my hobby project; I appreciate your patience during the review process.
2. Reporting and fixing a defect
Reporting and fixing a defect is also great contribution.
When you report an issue, please provide these information:
A clear and concise description of what the bug is.
A clear and concise description of what you expected to happen.
Screenshots to help explain your problem if applicable.
OS version
Python version
Each library versions
If you want to fix any bug, you can find reported issues in bug labeled issues.
If you fix a bug of existing codes, please add a test function in the test code to show the issue was solved. Use the failing inputs as a regression case and assert the corrected behavior, including relevant boundary conditions. Keep unrelated changes in separate PRs.
This doc submit a pull request can be helpful to submit a pull request.
3. Adding missed documentations for existing examples
Adding the missed documentations for existing examples is also great contribution.
If you check the Python Robotics Docs, you can notice that some of the examples only have a simulation gif or short overview descriptions or just TBD., but no detailed algorithm or mathematical description. These documents need to be improved.
This doc how to write doc can be helpful to write documents.
4. Supporting this project
Supporting this project financially is also a great contribution!!.
If you or your company would like to support this project, please consider:
If you would like to support us in some other way, please contact with creating an issue.
Current Major Sponsors: